|
|
|
|
Video Overlay
The video overlay feature allows you to place a logo, or other graphics "on top of" the video that is playing.
There are two kinds of files that can be used for a video overlay:
- PNG
-
SWF
The reason only these two file kinds can be used is because these file formats allow for "alpha" or transparency.
|
|

|
The trick with a video overlay is to create an image that uses the same dimensions as your video -- then place the logo in the lower left-hand corner.
To use a video overlay, you'll first have to create an image using a program that can create transparent PNG files such as Photoshop. Or you can also use Adobe Flash to create a transparent SWF file.
The example to the right shows how a transparent PNG file looks when opened in Adobe Photoshop.
The checker-board pattern is how Photoshop indicates transparency. You'll notice that the Wimpy logo in the lower right corner is barely visible because the logo is white, and slightly transparent itself. |
|
 |
Creating a PNG video overlay
Using Photoshop (or similar) create a new image and set it's dimensions to the same as your source video. In our example, we'll be using the dimensions of 240 x 320.
NOTE: Wasp will automatically adjust the video overlay to fit within the boundaries of the view port.
Create a new empty layer, then delete the background layer so that there are no pixels.
Pull your logo in, then position the logo in the lower right hand corner of the frame.
Lower the opacity (transparency) of the logo (or the layer that the logo is on) to 50%
Export the image as a PNG, using the following settings:
- PNG
-
24 bits
- With alpha / transparency
|
|
|
Creating an SWF video overlay
Using Adobe Flash, create a new movie.
|
|
|
Adjust the size of the main stage to match your video's dimensions. In our example, we'll be using the dimensions of 240 x 320. |
|

|
Select the box Rectangle Tool and draw a box on the main stage.
Select the box and adjust the size of the box so that it matches the width and height of the movie.
Align the box so that it is positioned at the x / y coordinates of 0 / 0 and fills the entire width and height of the main stage.
If there is an outline on the box, remove the outline.
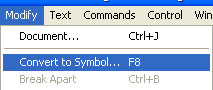
With the box still selected, hit F8 on your keyboard to convert the box to a symbol. (Or choose Main Menu > Modify > Convert to Symbol).
|
|

|
Import your logo and position it in the lower right hand corner of the main stage.
With the box still selected, hit F8 on your keyboard to convert the logo to a symbol. (Or choose Main Menu > Modify > Convert to Symbol.)
|
|

|
With the logo still selected, click the "color" drop down and select "alpha"
Adjust the slider to set the logo's alpha to 50%

|
|

|
Next, select the box and adjust it's alpha to 0% so that the box behind the logo is invisible. |
|

|
Export the movie as an SWF file using the following settings:
- Flash version 8
|
|
|
To include a video overlay:
1. Launch Wasp Publisher, then click the "media" tab. |
|

|
2. Next, click the checkbox for "Video Overlay ". Doing so will activate the text-field and the browse button.
Click the "browse" button and locate a PNG or SWF file-- or type a URL into the field.
|
|

|
3. Click the "Publish" tab, then publish the files to a folder on your PC.
Wasp Publisher will collect all of the files (including the advertisement file to the output folder.
|
|


|
4. Upload the files to your web site.
Use the "code" page (example_code.html) to include the player within your site. |
|
|
|
|
|
|