|
|
|
|
Loading Wimpy into another Flash project
To use Wimpy within your existing Flash project, use the "Wimpy Loader" example.
Before you begin:
- Upload Wimpy and any skin files to your web server.
- Created, uploaded and tested a "wimpyConfigs.xml" file. Follow the instructions for generating a Wimpy Configs" file by clicking here.
- Wimpy will **probably** NOT work when "testing" or viewing your compiled Flash project (SWF file) locally (on your PC). You must test Wimpy within your Flash project on a live server. This is due to "sandbox" security measures built into Flash (e.g. All files that run within a Flash project **should** be located on the same domain.com or sub.domain.com).
1. Download the Wimpy Loader example.
|
2. Copy and Paste the gray box with the Wimpy logo in it to your existing flash project.
NOTE: Click on images to enlarge.
|

|
3. Resize the gray box to the size you would like the player to be.
|

|
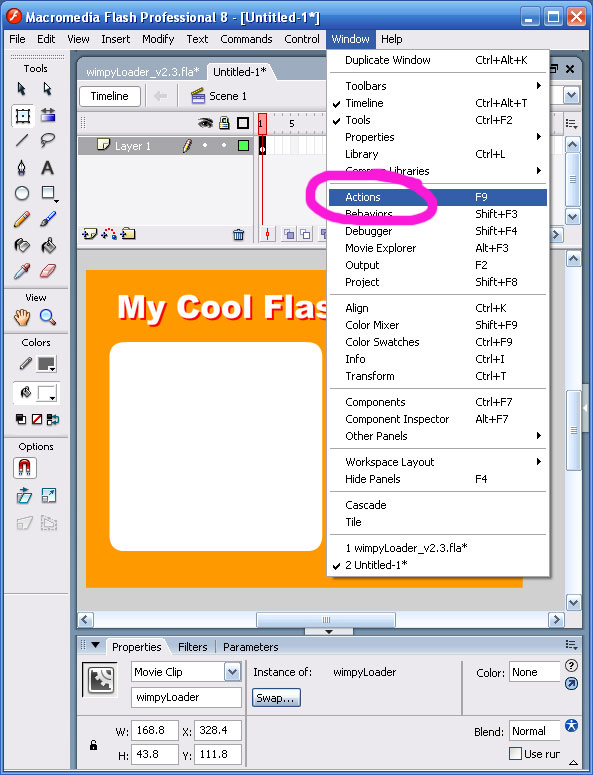
4. While the gray box is still selected, open the “Actions" panel. (From the Main Menu > Window > Actions)
|
|
5. You should see code in the Actionscript editor similar to the code shown in the image to the right.
|

|
6. Scroll down until you see:
_root.wimpySwf = "wimpy.swf";
_root.wimpyConfigs = "wimpyConfigs.xml";
|
 |
7. Change both variables so that they use the proper URL to each file on your server.
Example:
_root.wimpySwf = "http://www.yoursite.com/mp3s/wimpy.swf";
_root.wimpyConfigs = "http://www.yoursite.com/mp3s/wimpyConfigs.xml";
|
|
|
|
|
|